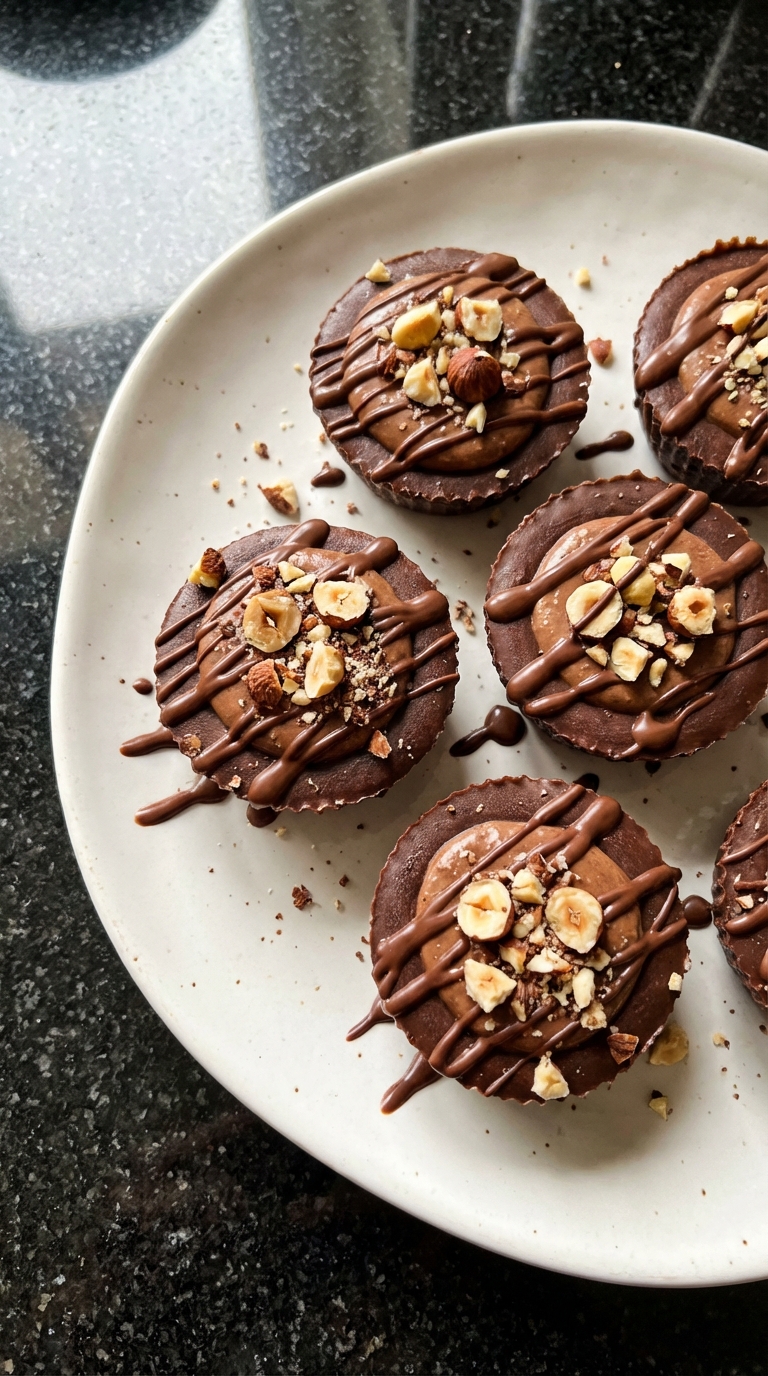
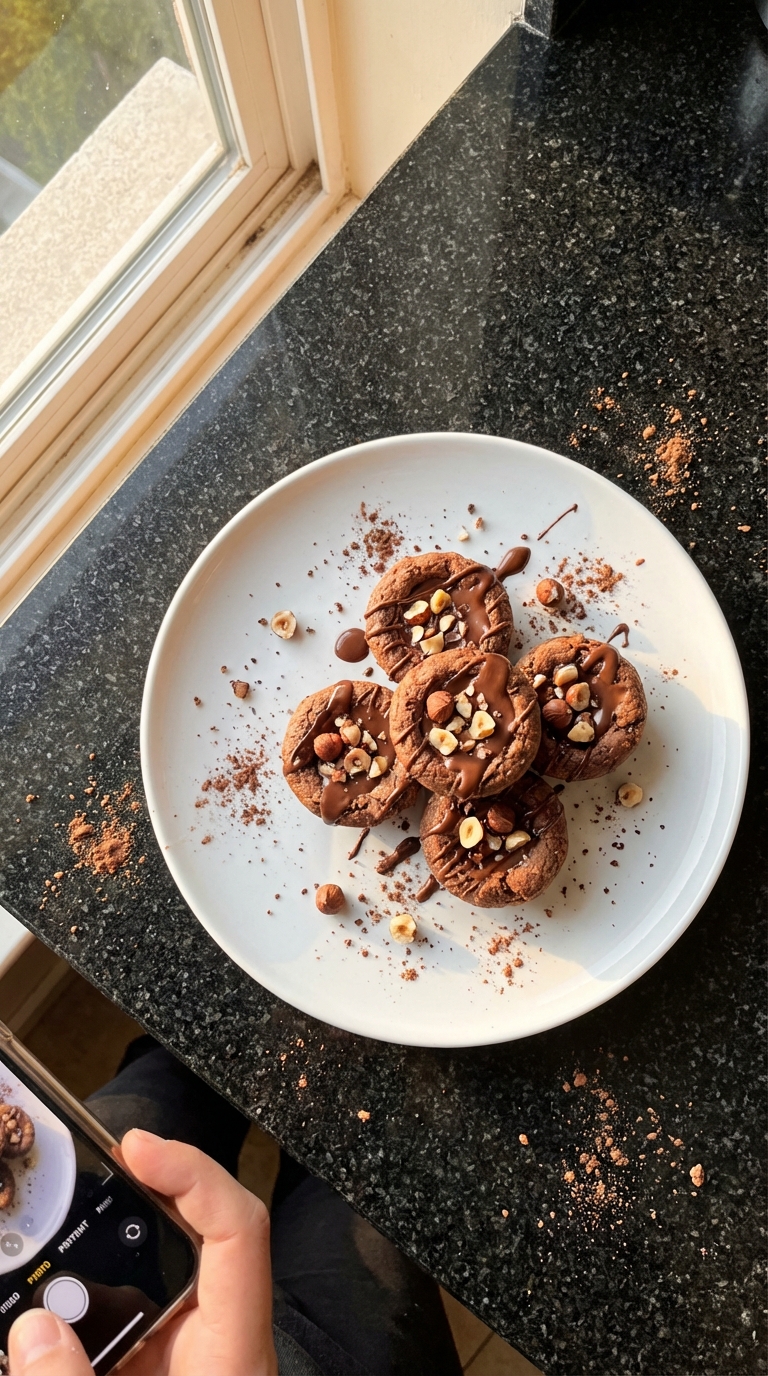
Quick Chocolate Hazelnut Cups
Highlighted under: Dreamy Dessert Lab
I love indulging in sweet treats, and Quick Chocolate Hazelnut Cups are one of my favorite go-to recipes. They’re incredibly easy to make and perfect for satisfying chocolate cravings. The combination of rich chocolate and crunchy hazelnuts creates a delightful texture that my entire family enjoys. Plus, the best part is that they can be whipped up in under an hour, making them an ideal option for spontaneous gatherings or a late-night snack. Trust me, once you try these, you’ll be making them on repeat!
When experimenting with desserts, I find that simplicity often yields the best results. While crafting these Quick Chocolate Hazelnut Cups, I discovered that using good-quality chocolate truly elevates the flavor, making each bite decadent yet satisfying. I used semi-sweet chocolate for a perfect balance of sweetness and richness that appeals to every palate.
Another essential tip I learned is to toast the hazelnuts briefly before adding them to the mix. This enhances their natural flavors and adds a delightful crunch that perfectly complements the creamy chocolate. Each cup turns out to be a little nugget of joy that’s hard to resist!
Why You'll Love These Cups
- Rich chocolate flavor paired with the crunch of hazelnuts
- Quick and easy to prepare for any occasion
- A delightful treat that satisfies your sweet cravings
Perfecting Your Chocolate Melt
Melted chocolate is the cornerstone of this recipe, and achieving the right consistency is crucial. When microwaving the chocolate and coconut oil, use a heat-proof bowl to prevent any reactions. Stirring between 30-second intervals helps distribute heat evenly, ensuring the chocolate melts smoothly without burning. The chocolate should be glossy and fluid when ready, making it easier to pour into the molds.
If you notice your chocolate isn’t melting properly, it could be due to moisture. Make sure your bowl and utensils are completely dry. Alternatively, if you have a double boiler, this method works great to melt chocolate gently over simmering water, which can help prevent scorching.
Layering for Crunch and Flavor
The layering of the chocolate and hazelnuts is what gives these cups their enticing texture. After pouring in the first layer of chocolate, let it sit for a minute to achieve a slight set before sprinkling the hazelnuts. This ensures that they adhere well and don’t sink in when additional chocolate is added. Use roughly chopped hazelnuts for optimal crunch—medium-sized pieces yield the perfect bite without overwhelming the chocolate flavor.
For a more dramatic flavor layer, consider toasting the hazelnuts lightly in a dry skillet over medium heat for a few minutes until fragrant. This not only enhances their nuttiness but also adds a deliciously crunchy texture that complements the creamy chocolate.
Storage and Serving Suggestions
Once your Quick Chocolate Hazelnut Cups have set, store them in an airtight container in the refrigerator. They can also be kept at room temperature for short periods but will soften. To keep them fresh, layering parchment paper between cups can help prevent them from sticking together. These treats can last up to two weeks, making them a perfect make-ahead option for cravings or gatherings.
For serving, you can sprinkle a pinch of sea salt on top before the chocolate fully sets to enhance the chocolate flavor. If you're feeling adventurous, try adding a drizzle of caramel or a sprinkle of crushed cookies on top for a fun twist. They also pair beautifully with a scoop of vanilla ice cream on the side for an elevated dessert experience.
Ingredients
For the Cups
- 200g semi-sweet chocolate, chopped
- 100g hazelnuts, roughly chopped
- 1 tablespoon coconut oil
For Topping
- Whole hazelnuts for garnish
- Sea salt (optional) for sprinkling
Instructions
Melt the Chocolate
In a microwave-safe bowl, combine the chopped semi-sweet chocolate and coconut oil. Microwave in 30-second intervals, stirring in between until completely melted and smooth.
Prepare the Molds
Line a muffin tin with cupcake liners or silicone molds. Pour a small amount of melted chocolate into each mold, just enough to cover the bottom.
Add Hazelnuts
Sprinkle a layer of chopped hazelnuts over the chocolate in each mold. Press them down gently with a spoon to ensure they stick.
Finish with Chocolate
Pour more melted chocolate on top of the hazelnuts, filling each mold to the top. Tap the tin lightly to remove any air bubbles.
Chill and Serve
Place the muffin tin in the refrigerator for at least 20 minutes, or until the chocolate has completely set. Once solid, carefully remove the cups from the molds and enjoy!
Pro Tips
- For an extra flavor boost, try adding a pinch of sea salt on top before the chocolate sets. You can also use dark chocolate for a richer taste.
Ingredient Substitutions
If you find yourself without semi-sweet chocolate, dark chocolate can be a lovely substitute, although it will yield a richer flavor. For those looking to avoid dairy, opting for dairy-free chocolate will work just as well and keep the texture intact. Coconut oil adds a smooth finish, but you can also use unsalted butter if you prefer or have it on hand.
For nut allergies, you could replace hazelnuts with similar-sized chopped seeds like sunflower or pumpkin seeds. This keeps the same texture while also providing a nutty crunch. Always check labels if accommodating allergies to ensure your alternatives are safe.
Troubleshooting Common Issues
One common issue you might encounter is the chocolate seizing. This can happen if even a small amount of water comes into contact with your chocolate. If this occurs, you can try to salvage it by adding a teaspoon of warm coconut oil gradually while stirring until smooth. This often helps bring back some of the creaminess to the texture.
Another problem could arise if your chocolate cups don’t hold their shape well after cooling. This might be due to overpouring or not allowing sufficient time for the chocolate to set. Ensure each layer is correctly applied and give them ample time in the fridge—at least 20 minutes should work, but letting them chill longer can solidify them further.
Questions About Recipes
→ Can I use different nuts?
Absolutely! You can substitute hazelnuts with almonds, walnuts, or pecans based on your preference.
→ How do I store the chocolate cups?
Store them in an airtight container in the refrigerator for up to two weeks.
→ Can I make these vegan?
Yes, just use dairy-free chocolate and coconut oil to keep them vegan.
→ What can I add for more flavor?
Consider adding a splash of vanilla extract or a hint of espresso powder to the chocolate for a unique twist.
Quick Chocolate Hazelnut Cups
Created by: The Brothrecipes Team
Recipe Type: Dreamy Dessert Lab
Skill Level: Easy
Final Quantity: 12 cups
What You'll Need
For the Cups
- 200g semi-sweet chocolate, chopped
- 100g hazelnuts, roughly chopped
- 1 tablespoon coconut oil
For Topping
- Whole hazelnuts for garnish
- Sea salt (optional) for sprinkling
How-To Steps
In a microwave-safe bowl, combine the chopped semi-sweet chocolate and coconut oil. Microwave in 30-second intervals, stirring in between until completely melted and smooth.
Line a muffin tin with cupcake liners or silicone molds. Pour a small amount of melted chocolate into each mold, just enough to cover the bottom.
Sprinkle a layer of chopped hazelnuts over the chocolate in each mold. Press them down gently with a spoon to ensure they stick.
Pour more melted chocolate on top of the hazelnuts, filling each mold to the top. Tap the tin lightly to remove any air bubbles.
Place the muffin tin in the refrigerator for at least 20 minutes, or until the chocolate has completely set. Once solid, carefully remove the cups from the molds and enjoy!
Extra Tips
- For an extra flavor boost, try adding a pinch of sea salt on top before the chocolate sets. You can also use dark chocolate for a richer taste.
Nutritional Breakdown (Per Serving)
- Calories: 200 kcal
- Total Fat: 14g
- Saturated Fat: 10g
- Cholesterol: 0mg
- Sodium: 5mg
- Total Carbohydrates: 20g
- Dietary Fiber: 2g
- Sugars: 15g
- Protein: 3g