Protein Cheesecake: An Incredible Ultimate Recipe with 7 Secrets
Protein Cheesecake is a healthy twist on a classic dessert that allows you to indulge without guilt. This guilt-free version is rich in flavor yet low in sugar, making it an outstanding choice for anyone looking to maintain a balanced diet while satisfying their sweet tooth. The smooth texture and creamy consistency of this cheesecake will surely make it a hit with everyone, whether you are a fitness enthusiast or just someone who craves a delicious dessert. In this guide, you’ll uncover why this recipe stands out, learn how to prepare it, and gather tips on serving it perfectly.
As you embark on this culinary adventure, you’ll find that Protein Cheesecake is not just about health; it is about flavor too! Imagine sinking your spoon into a luscious slice of cheesecake that is packed with protein and devoid of excess sugars. Each bite offers a delightful experience that will keep you coming back for more. It’s perfect for any occasion, whether it’s a post-workout treat or a dessert for a family gathering. Get ready to find out everything you need to know about crafting this amazing dessert.
By the end of this article, you will appreciate why Protein Cheesecake has gained popularity among health-conscious dessert lovers. You are about to learn how this simple yet exquisite treat embodies the perfect balance of taste and nutrition. Let’s dive into the world of Protein Cheesecake and discover the magic behind this stunning dessert!
Why You’ll Love This Recipe
The charm of Protein Cheesecake lies in its ability to deliver a delightful mix of flavors while providing nutritional benefits. Here are some reasons why this recipe will win your heart:
1. High in Protein – Incorporating protein powder boosts the nutritional value and helps keep you full longer.
2. Low in Sugar – This dessert uses healthier sweeteners, making it a guilt-free option for those watching their sugar intake.
3. Easy to Make – The straightforward steps ensure that even novice bakers can achieve perfect results.
4. Customizable – Whether you prefer a chocolate, vanilla, or fruity flavor, you can easily adjust the recipe.
5. Suitable for Various Diets – It caters to different dietary needs, including gluten-free and low-carb options.
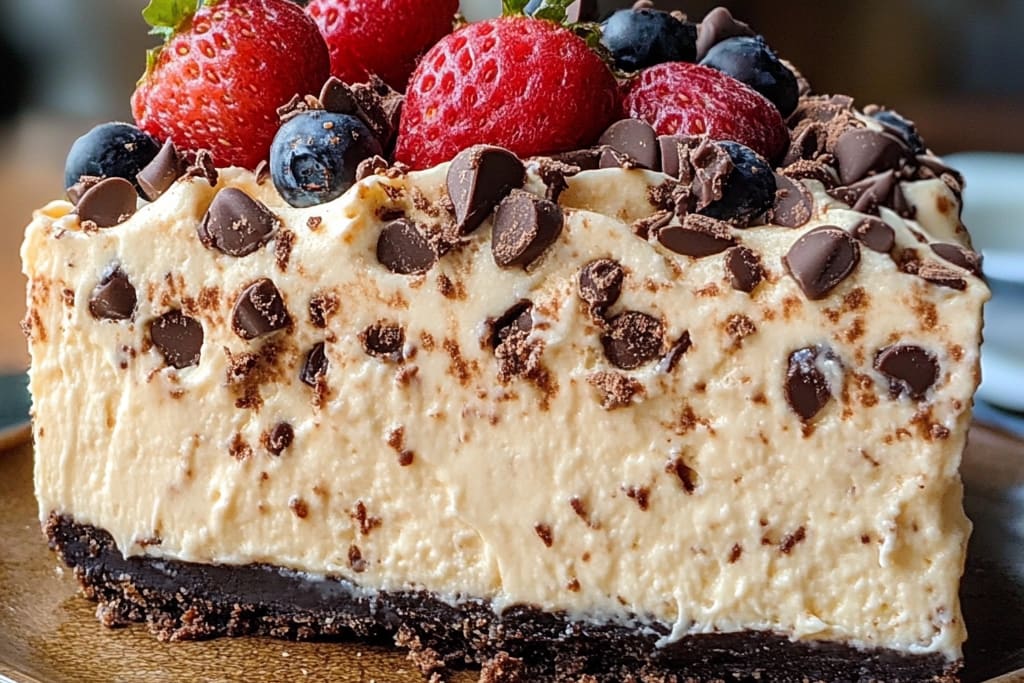
6. Impressive Presentation – Swirling fruit or chocolate on top creates a visually stunning dessert.
7. Satisfies Sweet Cravings – The creamy texture and rich taste fulfill your dessert cravings without derailing your healthy eating plan.
These features highlight why Protein Cheesecake is not just another dessert but an essential item in the kitchen repertoire for health enthusiasts and dessert lovers alike.
Preparation and Cooking Time
Making Protein Cheesecake is designed to fit into your busy lifestyle. Here’s how long you’ll be spending in the kitchen:
– Preparation Time: 15-20 minutes
– Cooking Time: 45-50 minutes
– Cooling Time: 2 hours (or overnight for best texture)
With a total time of about 3 hours including cooling, you can prepare this dessert effortlessly, allowing you to focus on other things while waiting for it to set.
Ingredients
– 2 cups low-fat cream cheese, softened
– 1 cup Greek yogurt
– 1 cup protein powder (vanilla or chocolate)
– ½ cup sweetener of choice (like stevia or erythritol)
– 3 large eggs
– 1 tablespoon vanilla extract
– 1 teaspoon baking powder
– ½ cup almond flour (optional for crust)
– 2 tablespoons butter (optional for crust)
– Fresh fruit or chocolate for topping (optional)
Step-by-Step Instructions
Creating a delicious Protein Cheesecake is more straightforward than you might think! Just follow these simple steps:
1. Preheat Oven: Preheat your oven to 325°F (165°C).
2. Prepare the Crust (Optional): If using almond flour, mix it with melted butter until it resembles wet sand. Press into the bottom of a springform pan and bake for 10 minutes. Allow it to cool.
3. Mix Ingredients: In a large bowl, combine the softened cream cheese and Greek yogurt. Mix until smooth.
4. Add Protein Powder: Gradually add the protein powder and sweetener. Ensure it’s well combined, with no lumps remaining.
5. Incorporate Eggs: Add eggs one at a time, mixing after each addition until smooth and creamy.
6. Flavors and Baking Powder: Stir in the vanilla extract and baking powder, mixing well.
7. Pour Mixture: Transfer the batter into the prepared crust or directly into the greased springform pan if you are not using a crust.
8. Bake: Place in the preheated oven and bake for 45-50 minutes. The center should be slightly jiggly.
9. Cool: Once baked, turn off the oven and let it cool in the oven with the door slightly ajar for about 30 minutes.
10. Refrigerate: Transfer the cheesecake to the refrigerator and cool for at least 2 hours. For best results, refrigerate overnight.
Now you have a wholesome Protein Cheesecake ready to serve!
How to Serve
To make your Protein Cheesecake even more enjoyable, consider the following presentation tips:
1. Garnish: Top with fresh berries, a drizzle of sugar-free chocolate sauce, or a dollop of whipped cream.
2. Slice Style: Serve in generous slices, keeping the portions reasonable to encourage seconds.
3. Pairing Options: Consider pairing it with a cup of coffee or you can also serve it alongside a refreshing herbal tea for an exquisite treat.
4. Storing Suggestions: Keep leftovers in the refrigerator, covered for freshness. It can also be frozen for longer storage; just thaw before serving.
With these serving tips, your Protein Cheesecake will not only taste incredible but also look beautifully appealing to your guests! Enjoy your healthy twist on a classic dessert!
Additional Tips
– Choose Quality Ingredients: For the best results, opt for high-quality cream cheese and Greek yogurt. This will enhance the flavor and texture of your Protein Cheesecake.
– Experiment with Sweeteners: If the sweetener of your choice doesn’t appeal to your taste, try alternatives like honey or agave. Just remember that this may alter the nutritional facts.
– Cooling is Key: Be patient during the cooling process. Allowing the cheesecake to chill properly will improve its texture and flavor.
– Top Creatively: Don’t limit yourself to just fruit or chocolate. Consider nuts, shredded coconut, or drizzled peanut butter for a unique twist.
Recipe Variation
Feel free to customize your Protein Cheesecake to suit your taste! Here are some variations to inspire you:
1. Chocolate Peanut Butter: Blend in ¼ cup of peanut butter into the cheesecake mixture for a rich, nutty flavor.
2. Fruit Swirl: Set aside some fresh fruit puree (like strawberries or blueberries) and gently swirl it into the cheesecake batter before baking.
3. Citrus Delight: Add the zest of one lemon or lime to the mixture for a refreshing citrus twist.
4. Coffee Lovers: Mix in 2 tablespoons of instant coffee or espresso powder for a delightful coffee-flavored cheesecake.
Freezing and Storage
– Storage: Store your Protein Cheesecake covered in the refrigerator to maintain its freshness. It can stay good for 5-7 days.
– Freezing: If you want to enjoy your cheesecake later, individually wrap slices and freeze them for up to 3 months. Thaw overnight in the refrigerator before serving.
Special Equipment
To successfully make Protein Cheesecake, you’ll need a few essential tools:
– Springform Pan: This is necessary for easy removal of the cheesecake without damaging it.
– Mixing Bowls: Use a large mixing bowl for combining ingredients and a smaller one if you’re making a crust.
– Hand Mixer or Stand Mixer: For effortless mixing and achieving that smooth texture.
– Spatula: A silicone spatula is crucial for scraping down the sides of the bowl and ensuring everything is well combined.
Frequently Asked Questions
How long can Protein Cheesecake sit out?
Generally, it’s safe to leave it out for about 1-2 hours. If you’re serving at a gathering, make sure it’s kept cool if it will sit for an extended time.
Can I use different types of protein powder?
Yes! While whey protein is commonly used, you can also experiment with plant-based protein powders if you’re looking for a vegan option.
What can I use if I don’t like Greek yogurt?
You can substitute Greek yogurt with cottage cheese or even silken tofu for a dairy-free version. Blend until smooth for the best results.
How do I know when the cheesecake is done baking?
The cheesecake is done when the edges are set, and the center is slightly jiggly. Remember, it will firm up as it cools.
Can I make mini Protein Cheesecakes?
Absolutely! You can divide the batter into cupcake liners for individual servings. Just adjust the baking time to around 20-25 minutes.
Conclusion
Protein Cheesecake is not just a dessert; it’s a deliciously healthy alternative that merges indulgence with nutritional benefits. With its creamy texture and the ability to customize flavors, this cheesecake is perfect for anyone, whether you are health-conscious or simply love a great dessert. Embrace this delightful recipe and enjoy your guilt-free sweet treat anytime!