Autocuiseur Pho: An Amazing Ultimate Recipe for 5 People
Autocuiseur Pho is an incredible way to enjoy a classic Vietnamese dish with minimal effort. This easy and flavorful recipe perfectly reflects the essence of Pho — fragrant broth, tender meat, and fresh herbs. The combination of spices used in the broth creates a warm and inviting aroma that fills your kitchen. Cooking Pho in an autocuiseur makes it accessible to everyone, whether you’re a busy parent or a culinary novice.
Pho expresses the heart of Vietnamese cuisine, offering a rich tapestry of flavors in its delicious broth. The way flavors meld together in this dish will impress your family and friends. It’s comforting, fulfilling, and ideal for a gathering of loved ones. In this article, we will dive into why this recipe has gained popularity, how to prepare it, and tips for serving it perfectly. Let’s get started on this ultimate Pho experience!
Why You’ll Love This Recipe
The Autocuiseur Pho offers several advantages that will make you fall in love with preparing this dish:
1. Quick Cooking Time – Using an autocuiseur drastically reduces the time needed to make this delicious dish, allowing you to enjoy your meal sooner.
2. Flavorful Broth – The pressure cooking enhances the infusion of spices into the broth, leading to an incredible depth of flavor.
3. Tender Meat – The high-pressure environment ensures that your meats, especially brisket and chicken, turn out tender and juicy.
4. Easy to Follow – The recipe comes with straightforward steps that ease any cooking anxiety.
5. Perfect for Meal Prep – You can prepare a large batch that can be enjoyed throughout the week, saving you time and effort.
6. Customizable Ingredients – Feel free to add your favorite herbs, vegetables, or protein options for a personalized touch.
These features together create a delightful meal that is not only satisfying but also effortless to prepare!
Preparation and Cooking Time
To cook this delicious Autocuiseur Pho, you will require approximately 1 hour and 10 minutes. Below is the breakdown of the time commitment:
– Preparation Time: 15 minutes
– Cooking Time: 40 minutes
– Natural Release Time: 15 minutes
These are general estimates and may vary based on your kitchen setup and experience level.
Ingredients
– 2 pounds beef brisket
– 1 onion, halved
– 4-5 slices of ginger
– 5 star anise
– 2 cinnamon sticks
– 1 tablespoon coriander seeds
– 5 cloves
– 3-4 tablespoons fish sauce
– 8 cups water
– Rice noodles (according to serving needs)
– Fresh herbs (basil, cilantro, mint)
– Bean sprouts
– Sliced jalapeños
– Lime wedges
– Green onions, chopped
– Hoisin sauce (optional)
– Sriracha (optional)
Step-by-Step Instructions
Creating Autocuiseur Pho is a straightforward process that anyone can master by following these steps:
1. Prepare the Ingredients: Gather all your ingredients and rinse the rice noodles under cold water. Set them aside.
2. Sear the Onion and Ginger: In the autocuiseur, place the halved onion and ginger slices. Set to the sauté mode and sear until lightly charred, about 3-5 minutes.
3. Add the Spices: Stir in the star anise, cinnamon sticks, coriander seeds, and cloves with the onion and ginger. Cook for another minute to release their flavors.
4. Brown the Brisket: Add the brisket to the autocuiseur, browning it on all sides for approximately 5-7 minutes.
5. Add Fish Sauce and Water: Pour in the fish sauce and add the water until the brisket is submerged.
6. Pressure Cook: Close the lid, sealing the autocuiseur. Set it to high pressure and cook for 40 minutes.
7. Release Pressure Naturally: Once it beeps, allow the pressure to release naturally for about 15 minutes before carefully opening the lid.
8. Remove the Brisket: Take the brisket out and set it aside to rest. Use a strainer to remove the spices and solids from the broth.
9. Slice the Brisket: Once the brisket has cooled slightly, slice it against the grain into thin pieces.
10. Prepare the Noodles: Prepare the rice noodles according to package instructions, typically soaking them in hot water until tender.
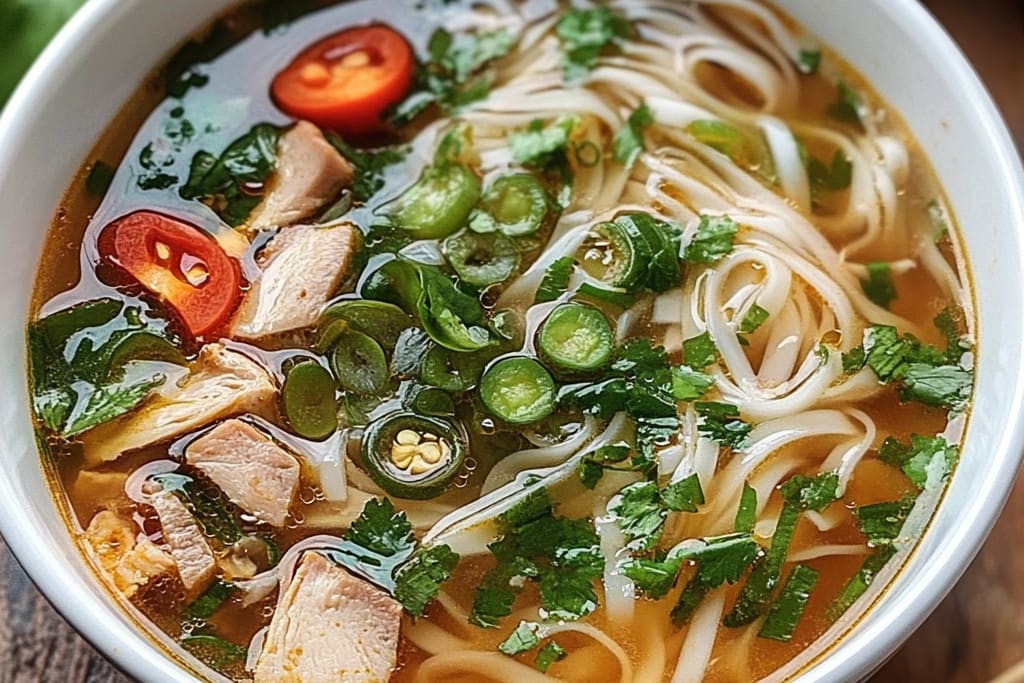
11. Assemble Bowls: Place a serving of noodles in each bowl and top with sliced brisket. Ladle hot broth over the noodles.
12. Garnish: Top with fresh herbs, bean sprouts, sliced jalapeños, lime wedges, and chopped green onions. Offer hoisin and sriracha on the side for extra flavor.
By following these steps, you’ll create a wonderful bowl of Autocuiseur Pho in no time, filled with rich flavors that will tantalize your taste buds.
How to Serve
To provide an unforgettable experience with your Autocuiseur Pho, consider the following serving suggestions:
1. Presentation: Use deep bowls to help retain heat while presenting your Pho aesthetically.
2. Garnishes: Make sure to include bowls of fresh herbs and garnishes at the table for guests to customize their own bowls.
3. Accompaniments: Serve alongside freshly cut lime wedges, which add a zesty kick. Offer hoisin and sriracha for those who enjoy a touch of sweetness or heat.
4. Drink Pairing: Light, refreshing beverages like iced tea or a crisp lager can complement the flavors of Pho.
5. Serving Style: Allow everyone to create their bowl, making it a communal and interactive dining experience.
By focusing on these details, you can elevate your Autocuiseur Pho into a delightful culinary adventure for you and your guests.
Additional Tips
– Experiment with Spices: Feel free to add different spices such as cardamom or nutmeg for a unique flavor profile.
– Adjust Broth Intensity: If you prefer a richer broth, let it simmer longer in your autocuiseur before releasing the pressure.
– Use Fresh Herbs Generously: Fresh herbs can elevate the flavor, so don’t skimp on basil, cilantro, and mint.
Recipe Variation
There are many ways to customize your Autocuiseur Pho to suit your tastes. Here are a few ideas:
1. Vegetarian Pho: Swap out the beef brisket for tofu or mushrooms, and use vegetable broth instead of water.
2. Different Proteins: Experiment with chicken, pork, or seafood for varied protein options.
3. Noodle Alternatives: Try using egg noodles or zucchini noodles for a different texture or low-carb option.
Freezing and Storage
To make the most of your Autocuiseur Pho, consider the following storage tips:
– Storage: Keep remaining broth and ingredients in airtight containers in the fridge for up to three days.
– Freezing: You can freeze the broth and meat separately for up to three months. Just be sure to cool them completely before packing them in freezer-safe containers.
Special Equipment
You will need a few essential tools to prepare this dish effectively:
– Autocuiseur (Pressure Cooker)
– Slicing Knife
– Strainer for removing spices
– Mixing Bowl for preparing garnishes
– Serving Bowls for assembling Pho
Frequently Asked Questions
Can I use a different type of meat?
Yes, you can use chicken, pork, or even shrimp as alternatives.
How do I know when the meat is tender?
The meat should easily shred with a fork once it is cooked.
Can I add more vegetables?
Absolutely! Feel free to add veggies like carrots, mushrooms, or bok choy to enhance the nutritional value.
What if I can’t find some spices?
You can usually find substitutes at your local grocery store or leave out spices that are hard to find.
Can I prepare the broth in advance?
Yes, you can prepare the broth a day in advance. Let it cool and store it in the refrigerator until needed.
Conclusion
Autocuiseur Pho is not just a meal; it’s an experience that brings the warmth of Vietnamese cuisine into your home. With fragrant broth, tender meat, and customizable toppings, this dish offers something for everyone. Whether you follow the traditional recipe or opt for a variation, you’ll find that preparing Pho in an autocuiseur is both easy and satisfying. Gather your loved ones around the table and enjoy a comforting bowl of Pho that will surely please every palate!